This blog will be going on hiatus for a bit, while I work out what I really want to do with it.
If you'd like to read my continued waffling about sewing, knitting, corsets and anything else that crosses my mind, you can find me here:
The Eternal Magpie
Saturday, 2 August 2008
The Eternal Magpie...
Tuesday, 29 July 2008
Simplicity 2927
This morning I had a very productive time drafting a pattern for a pair of leggings. By lunchtime I'd transformed a piece of lovely cotton jersey that I bought from The Cloth House several years ago, and in the afternoon I started on a simple tunic to go with them.
Say hello to Simplicity 2927: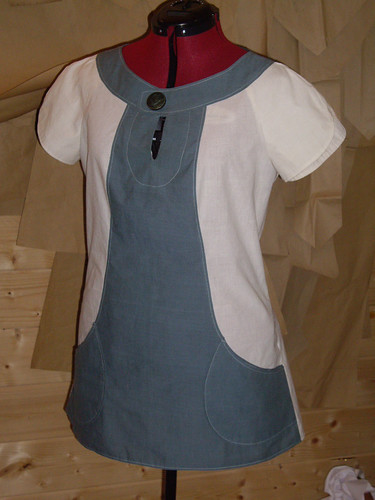
It's not finished yet, mostly because I was taken by surprise at how complicated this little dress turned out to be!
It's one of Simplicity's Project Runway patterns. As it happens I've never actually watched the TV show, but I'd sort of assumed that the point of the patterns was to encourage young wannabe designers into sewing their own clothes.
We'd already discovered at work that the patterns are quite difficult to read. The back of the envelope is quite confusing in terms of being able to work out what you need (more so than normal!), and the instructions often seem unnecessarily complicated.
This particular design comes in a choice of two lengths, has three different sleeve styles, and optional pockets. Directions are also included for piping all of the seams. Throughout the pattern you're sewing concave to convex edges to make the curved side front seams and the neck band. The sleeves are either faced or bagged out. The front facing's rather fiddly, and the sleeves and neck band were a nightmare to put together neatly.
I sew three or four days out of every week, and I found this pattern rather difficult!
I certainly wouldn't recommend it to anyone who didn't already have plenty of sewing experience - and plenty of patience. It took me around six hours to get this far, and I was expecting it to take about half that time.
As I was putting this little tunic together, I was a bit worried that my choice of colours was going to make me look like a dental nurse. Looking at the photo though, I think the style is quite cute. Slightly sixties-looking, and I think the button makes all the difference. I don't know whether that's going to be my final choice of button - I need to see the colours in daylight - but I think whichever button I choose, it needs to be a big one.
All I need to do now is put in the zip, finish off the last few loose ends, and give the whole thing a good pressing. I'm disappointed that I couldn't get it finished today, as I was planning on wearing it to work tomorrow, along with my new leggings!
Still, I'd rather do it properly, than try to finish it in a hurry and make a mess of it.
I keep going back to these little raglan tunic patterns, so I guess my next step is to draft one of my own. Whatever I come up with, I do know that it won't have a neckband, and it won't have such complex curves! I'm still in love with the pockets though.
Tuesday, 15 July 2008
Decisions, decisions...
My next dress mock-up doesn't need to be ready until the end of August. Between the next cupcake dress, some slippers, more tote bags and maybe a corset or two, I think I might finally have found the time to make myself a new coat. (Yes. In the middle of summer. I know.)
I bought this Waverley flamingo print fabric last year, and I keep not-deciding what sort of coat it should be. I bought the Indygo Junction pattern and the giant button specifically with this fabric in mind, but having just finished Jenny's brocade coat, I am extremely tempted to make this in a piratey style!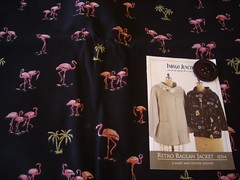
I've also been searching high and low for flamingo-shaped buttons, and finally I have managed to come up with these: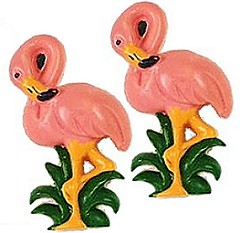
They're from a website called Uptown Flamingo, and they're $4.95 for two, or $24 for 12. I might drop them an email to ask about shipping costs. How could I make a flamingo coat without even trying to buy some flamingo buttons?
There should even be enough fabric left over to make a bag. Or a hat.
A hat! With flamingo buttons on the side!
Sorted.
We have a plan.
The brocade coat is finished!
I know these photos aren't of the best quality - it's pretty dark out there today, and for some reason my camera refuses to focus on this fabric properly. Hopefully I'll be able to take some better pictures at the weekend, when Jenny comes to collect it.
You can see all the pictures of the coat as it progressed over at Flickr.
For those of you interested in the details, it's made from John Lewis Classic Brocade, from the furnishing fabrics department! The lining and contrast details are made from polyester satin-backed dupion, and the interfacing is horsehair canvas. There are sixty-four buttons in total.
The first picture shows the inside of the coat, because that's where most of the time went! The facings and the hem were hand-stitched, and you can see the twenty internal buttons at the centre front. As well as balancing the weight of the heavy metal buttons on the outside, they also have another useful function. Jenny can fold the braid loops to the inside and fasten them around these little buttons, if she wants to wear the coat open. That way the loops don't catch on all the buttons, or get in the way.
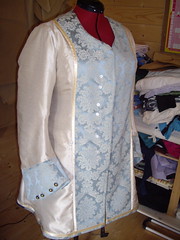
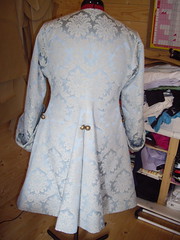
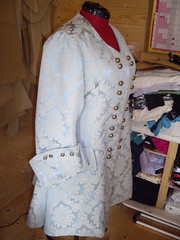
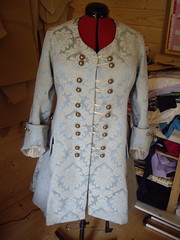
The pattern is Simplicity 3677, their women's "Pirates of the Caribbean" costume. I added the lining and the pockets, and used different methods for the finishing. The only other deviation I made from the pattern was to make a full bust adjustment, for a better fit.
I can't wait to see Jenny try it on!
Wednesday, 9 July 2008
Buttoned up...
I was hoping to finish Jenny's coat today. Six hours of hand-sewing later, and I realise that I have vastly underestimated how long it would take to sew on all the buttons!
Today I have stitched down the facings to the lining, and bound the bottom edge of the coat. Oh, and sewn on forty buttons. Yes, forty! (Twenty of them are on the inside.)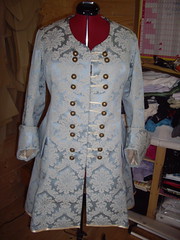
Twenty-two more buttons to go, and then all I have to do is press the cuffs and turn up the hem.
I honestly have no idea how many hours I've put into making this coat. more than I expected, but then I always underestimate how much time it takes to do the finishing touches. Somehow this coat seems to have been made up entirely of finishing touches!
Even though the coat isn't mine, I should probably to confess to having tried it on. I had a sneaky flounce around the Shed in it, and it's absolutely gorgeous to wear. It's definitely on my list as one of the things I want to make for myself, when time permits. I wonder how it would look in pink PVC with little white spots...?
Tuesday, 8 July 2008
Poked and prodded.
I've been a bit quiet here lately, having spent a week being poked and prodded and scanned and x-rayed, only to reach the conclusion that despite feeling very poorly indeed, there's apparently nothing wrong with me. Reassuring, but frustrating at the same time.
In between ultrasounds and blood tests and trips to the doctor, I have been making this:
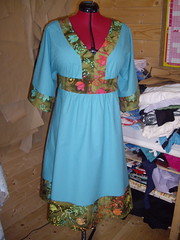
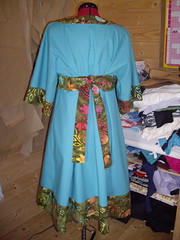
It's Simplicity 4072, the same pattern as the cupcake dress, and this one's for Nicola.
The cupcake dress is in fact for sale, if anyone's interested? It's a size too big for me, and is sadly not very flattering to my figure shape. It needs to go to someone with a more generous cleavage than mine!
Overbust measurement will fit up to 38", underbust/empire waist measurement is also 38", but this pulls in at the back with the ties. The dress has been worn and washed once. £45.
Monday, 30 June 2008
A tiny piece of history.
Inspired by Ruth Singer, I've spent this afternoon making a wall hanging organiser for all my reels of thread.
(Possibly not the cleverest thing to do when suffering with a bad wrist and a splitting headache, but hey.)
Take one enormous cork board, a hundred and eighteen panel pins, and a big hammer...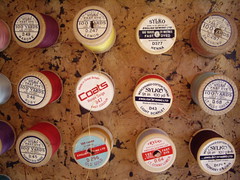
I particularly like "Turkey Red Shade" and "Dk. Shrimp". Giving all of the colours numbers instead of names just isn't as much fun.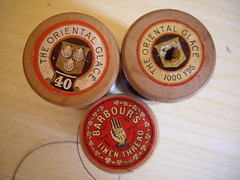
I think these are my favourites. "Barbour's Linen Thread" is perfect for sewing together my little shoes - I only wish I could buy some more!
The Glacé threads are very fine, but strong enough for sewing shoes, books and bags. The 40 weight is also good for quilting, apparently.
Less than forty of the threads on that board are mine - the rest came from my Grandma Rose and my Aunty Sue. My Grandma's 87 now (I think), and I haven't known her to do much sewing during the past 34 years, so some of those threads must be pretty old. I don't know that I'd want to use some of the oldest cottons for sewing seams, but they'd be lovely for decorative work.
I'm extremely amused to notice that, with very few exceptions, these reels of thread represent three generations of loyalty to the same brand. Sylko, Drima and Coats have all become merged over the years, into the thread division of Coats Crafts.
Shame the packaging isn't as beautiful as it used to be.
I love it when a plan comes together.
Today, Madame Queeny posted this picture: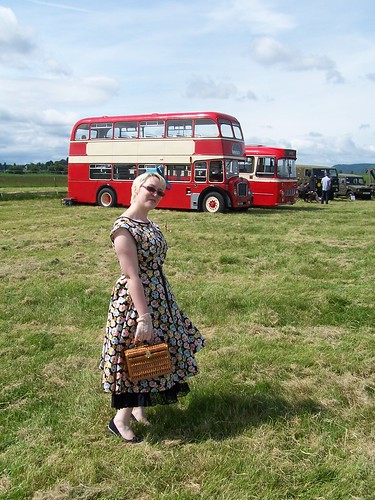
In it, she is wearing a dress that I made - one of my several incarnations of Butterick B4790. She wore it to a vintage vehicle rally, and the design is so distinctive that apparently somebody ran across the field to her, yelling out the pattern number!
Amongst other things, Madame Queeny makes hats.
Amongst other things, I work in a fabric shop.
My town is fairly local to Ascot racecourse, so in the weeks running up to Royal Ascot, particularly Ladies' Day, the shop was rather busy.
One lady came in and bought a lovely vintage Vogue dress pattern, and lots of silk dupion. As I was sorting everything out for her, she just happened to comment that all she needed to go with the dress was a little vintage-style hat. I recommended Madame Queeny, and lo and behold, she was commissioned to make a little hat for Royal Ascot!
It makes me really excited whenever friends and fellow craftspeople can help each other out like this. :)
Saturday, 28 June 2008
Recycled tote bags...
This afternoon I have been in a frenzy of chopping up twenty-nine year old pillowcases. Well, okay, not all of them were that old, but the Star Wars one said "©1979" on the bottom, and the Dangermouse one isn't much more recent!
I have six bags so far, destined for the Art Market next Saturday, assuming I snag a place from the waiting list. I am quite happy to sell them to you though, if you want them! They're a fiver each, plus £1 UK p&p.
I have two spotty bags, two Star Wars (Empire Strikes Back), one Paddington and one Dangermouse.
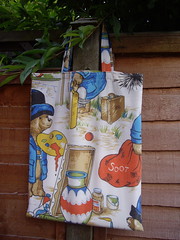
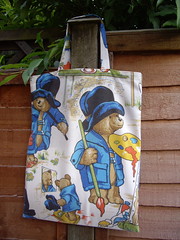
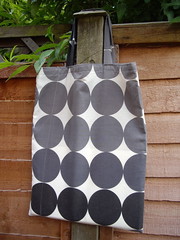
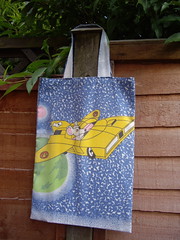
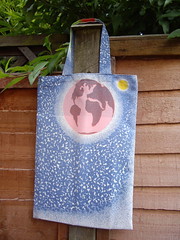
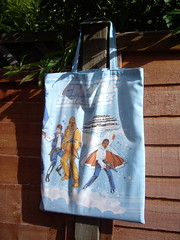
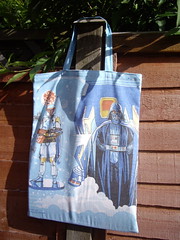
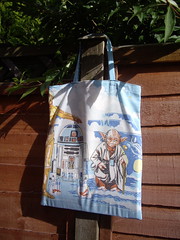
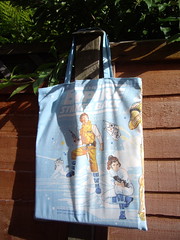
Coming soon are Finding Nemo, ET, Dennis the Menace, The Wombles, The Simpsons and Winnie the Pooh.
Yes, I do have a Shed full of pillowcases!
Posted by
Claire Smith
at
17:57
![]()
![]() 0
comments
0
comments
Labels: Dangermouse, paddington, recycled, refashioned, Star Wars, tote bags
Friday, 27 June 2008
Preparing the badges...
The Reveal Showcase exhibition starts next weekend, and just for once I'm prepared well in advance!
I've spent today preparing all the badges for display. I've used mini cards and postcards from Moo for my packaging. I'm a big fan of Moo, and the mini cards are just the perfect size: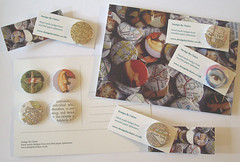
I have forty individual badges, and twenty sets of four. I have no idea whether this is far too many, or nowhere near enough. I guess I'll find out as the week of the exhibition goes on. I have plenty more materials, so I can always put together some more if I need to. (Or sell them at the next Art Market, if I end up bringing them all home again...)
My only concern now is how to display all of the postcards and mini cards at the exhibition itself. I don't really want to spend money on a fancy stand that I'll never use again, and I don't really want to spend all of next week making something wonky out of cardboard.
What I really need is a pretty letter rack, or maybe a vintage toast rack of some kind...
Tuesday, 24 June 2008
Cutting and Sticking.
Today I have been mostly Cutting Things Out.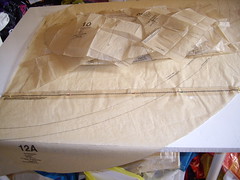
These are the pattern pieces for Laura's dress, otherwise known as Vogue 8470.
As you can see, the skirt's a full circle. The slight difficulty with this is that the pattern pieces are too wide for my cutting table! It is only a slight difficulty though, as I've wrestled with this problem before - mostly in the form of Butterick 4790.
The pattern has markings for two lengths - one to the knee, and the other to mid-calf. I'm making the toile in the longer style, as Laura is pretty tall. That way I can mark in the best hemline when she tries it on, rather than trying to imagine extra length from a toile that's too short.
I'd already bought a copy of this pattern for myself, and I think the shorter version will be an ideal candidate for the Liberty knitting fabric.
I am wondering though, whether the longer version might be a candidate for my wedding dress. Midriff panel in gold and cream brocade, the rest in floaty gold shimmer viscose, just short enough to show off the shoes... and enough brocade left over to make a little bolero jacket. Hmm.
Monday, 23 June 2008
Progress on the damask coat...
This is where I'm up to on the damask coat: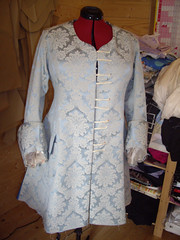
I'm stalled on the project for now, as I've just run out of thread. I don't think I opened a fresh reel when I started this project, but I didn't expect 500m to disappear so fast!
Most of today's work has been on the inside of the coat again. The front facings are now in - self fabric, with horsehair canvas inside for stiffness. The same stuff is inside the cuffs, to help them stand up by themselves. My Shed now smells like a stable block, thanks to the application of steam to horsehair. Stinky!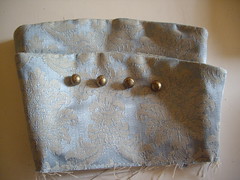
Here are the cuffs, along with the buttons that I'm going to use.
I have 38 of these little beauties, in three different sizes. Eight for the cuffs, eight for the pockets, twenty for the centre front, and two for the centre back. I might add four more, over the side godets, as long as they won't get caught in the cuffs.
And then I have to do the hem. Between that and the buttons, it might take a while...
Sunday, 22 June 2008
I do like the Internet.
Yesterday, Mamfa popped by specifically to leave a comment that she'd seen a pair of Those Shoes in a size 5, in a shop in Leeds.
Mamfa doesn't know me, she saw my post via the friends list of a community that we both visit. But she had some useful information, and took the time to leave a comment and pass it on. Wasn't that kind?
Further investigation reveals that the shoes are now back on the Schuh website, and that my local branch apparently has a couple of pairs in stock.
Hopefully Liz and I will have our wedding shoes after all!

While I'm on the subject of awesome shoes (when am I not?), you could do worse than to check out Em & Sprout's Etsy store.
Are they not the most adorable shoes you've ever seen? So cute!
Wednesday, 18 June 2008
The Devil's In The Details
Earlier this year, Paul and I got engaged. Presumably this means that at some point in the future there will be a wedding. So, of course, I did what any ridiculously addicted freshly engaged woman would do - I went shoe shopping.
I saw a pair of shoes, by Irregular Choice. I saw them on the Schuh website, and I went into my local branch to try them on. Two weeks later, after I'd been paid, I went back to buy the shoes. And they'd gone. No longer for sale in the shop, no longer online.
(I may have said a rude word. A nice man is trying to mail order a pair for me. He'll let me know.)
This evening I was browsing on Amazon, when I remembered that they sell shoes too! I had a little look, and I found what I thought were the shoes I was coveting. Then I looked a little closer, and realised that whilst they looked a bit like my shoes, they weren't my shoes at all.

(Click for larger)
The shoes at the top are the ones that I'm coveting. (I couldn't find pictures of the cream and gold, so I'm showing you the red in both styles, for a more accurate comparison.)
See how the toes are extremely pointy, and the strap is quite low down?
See how the heels are higher, and more shapely, and self-covered?
See how the suede is different?
These are, quite emphatically, not the same shoes.
Yet they're made by the same company, at the same price, and sold under the same name. How peculiar.
I'm sure that plenty of people will be looking at the picture and wondering what on earth I'm fussing about. Yes, the shoes are very similar. But to me (and I realise this is merely a matter of opinion), the top shoes look glamorous and elegant and sumptuous and lovely. The others look somehow mediocre and cheap.
If I hadn't seen the top shoes first, would I be coveting the others? It's impossible to say. But I know that if I can get a pair of the cream and gold ones by mail order, if they're the same style as the bottom pair, I'm sending them back.
Tuesday, 17 June 2008
Jenny's coat - now with sleeves!
Just so that you don't think I faff around making corsets all day when I should be sewing for other people - here is the latest work in progress picture of Jenny's coat:
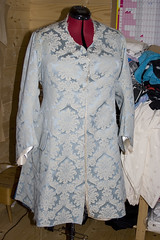
Please, please click through to the largest version, so that you can see how absolutely fabulous this fabric is. Really. Please?
So, yes, I now present to you Jenny's coat - with sleeves!
I know that doesn't look like much of a development since last time, but the majority of today's work has actually gone into the inside.
It's always tempting to skip some of the bits that will never be seen, or just whiz things through the overlocker. But at the end of the day, doing it properly is what makes the difference between a really nice coat that will last for years, and something that looks okay, but is going to lose its shape after a couple of outings.
Small things, like grading and clipping seams, and pressing them at every stage, can make the most enormous difference to the finished garment, whether it's a coat, a corset, or a tote bag made out of an old pillowcase.
That's why I've spent most of the afternoon ironing.
(And also yet another example of why I'm really not charging anything like enough money for this!)
Monday, 16 June 2008
I appear to have (mostly) made a corset.
I spent all morning faffing around with my printer, trying to put together some packaging for my badges, and sadly failed miserably. As a result, I decided to spend the afternoon doing something a little more productive.
So, I made a corset.
This is the first mock-up from the pattern I drafted the other day:
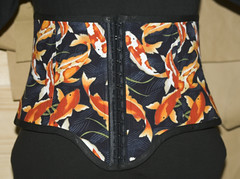
It's made from three layers - cotton fashion fabric, a heavy drill for strength, and the lining is some lightweight black poly/cotton I had lying around. The waist tape is enclosed between the layers and is made from grosgrain ribbon, and the binding's black poly/cotton.
The bones are Rigilene (two on each seam, plus front and back), and the front fastening is hook and eye tape. I'm waiting for my steel bones and busk to arrive, and I had these on hand, so I thought they'd be okay to just test the pattern.
I know it doesn't look very shapely, but that's because I'm not a very curvy shape! I wanted my first draft to fit my body shape pretty closely (this gives a two-inch reduction at the waist) before I started messing around with different proportions.
Sadly I can't try it on just yet, because the last thing I need to do is add the grommets!
As you can see, I didn't bother too much about pattern-matching on this one, as I was just using up a small remnant of fabric. The binding's also done on the sewing machine rather than by hand, just for speed.
I think it looks okay for a first attempt though - although it remains to be seen how it behaves once I put it on.
Sunday, 15 June 2008
Scanning Things In.
Today I have been mostly Scanning Things In.
I promised Rob that I'd send him a pile of photographs of Things We Did Together. As he's still very much paper-based and all of my recent photos are online, it made sense that I'd scan the photos in and send the originals to him.
I was a bit nervous about this at first. My photos! But as soon as I started to see the results of the scanning, I was more than happy to keep my old photographs in digital form. At 300 dpi, you can see a lot more detail than you can at 6 x 4".


These two are from Exeter Cathedral (1998) and Cardiff Castle (2001), respectively.
I've scanned in almost 200 photos so far, and there are still more to go through. Most of them are set to "private" on Flickr at the moment, as I haven't yet checked with Rob whether or not he's happy for them to be shared.
If you fancy a bit of amusement though, there are two galleries full of beer-fuelled shennanigans over on Facebook, in the form of lots of parties at the Hobgoblin. My photos are from 1995 to 2001, although I'm sure I'm still missing a box somewhere. The galleries are here and here. I don't think you need to be signed in to Facebook or me on my Friends list to see them. Let me know if that's not the case?
What I'm wondering now is what on earth am I going to do with all my photos?! I've got absolutely hundreds of the damn things, all stored away in boxes, and I never look at them.
I think my first challenge is to get them all scanned in, and all backed up onto CDs. That way I have two digital versions of them, as well as the paper ones that I'm still keeping. I'd quite like to do more with the paper ones than just shove them back in a box though. I recently inherited lots of family photos from my two Grandmas, so it would be quite nice to put together some new albums with those pictures shuffled into the chronological order.
I took all my photos out of their albums many years ago, as I was using those self-adhesive ones, and was worried about the photos being damaged. I have some lovely new albums, old-fashioned ones with black pages, but I haven't got around to doing anything with them.
As always, I think this is something I'm going to have to work on in my Spare Time. I have plenty of access to the scanner this week though, so at least I can get a move on with that part.
Knitting and Photography
I've just been updating my projects on Ravelry, and apparently I have completed 40 projects since I started knitting in 2005. Does that seem like a lot? And that doesn't even include all the things I've unravelled, or the things I'm knitting right now!
Here are my two most recent knitting photographs:
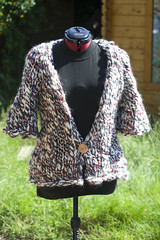
The jacket on the left is Murmur, from Rowan's The Next Big Thing book. Sadly it's another one of those unfortunate incidents you often find when knitting or sewing - you spend lots of time, money and effort making a thing, only to discover when it's finished that you don't like it, or it doesn't suit you.
So, it fits chest 36-40", and it's for sale! £40, or I'll happily trade for 6 balls of Colinette Point 5. Any colourway, I'm not fussy. ;)
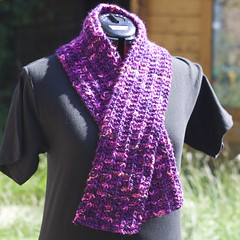
The purple scarf on the right is The Yarn Harlot's One Row Handspun Scarf. It will shortly be going up on Etsy for $30/£15, unless anyone really wants to grab it first?
I appreciate that it's not really scarf weather, which is why I also took some photos of my most recent little felted bag. It's in the same colourway as the jacket above, but I could not for the life of me get a good photograph of it.
Paul's gone off to America with work, and he didn't want to take his SLR with him, so I've lent him my little compact camera for the week. To begin with I was quite excited about playing around with Paul's Canon EOS 350D. And then I tried to use it. Ugh, what a pain!
For a start off, it weighs a ton, which is not very useful when you've got a sore wrist. Then I discovered that Paul had left the 70 mm macro lens attached, which is no use at all when you're trying to take a picture of a whole jumper! I managed to change the lens to a 55-200 mm one, and discovered that I still had to stand approximately eighty-seven miles away from the jumper if I wanted it to be in focus. I also have a headache from squinting through the viewfinder.
I think the only thing I liked about using this camera was the short depth of field you get from these particular lenses. I can only achieve that with my camera when it's on the macro or super-macro settings, and then it won't focus if you're more than 20-100 mm away from the subject.
Obviously my little Pentax Optio A30 has its limitations. It's fiddly to focus it manually, you can't change the lens, and it doesn't shoot in RAW format if you want to fiddle with your photos in an artistic manner after you've taken them. But I love the large screen instead of a viewfinder, I love that you can choose to use all of the settings manually if you want to, and the super-macro setting is very good. (The "face recognition" software is rubbish though.)
Paul and I went for another walk round the lake yesterday, and Paul took some more lovely photos of birds. I was feeling quite envious of his camera and photography skills, and went back through some of my old pictures to find ones that I'd taken with the film SLR. There were some lovely ones in there, but I think I've taken some much nicer photos with my little Optio than I ever did with my old SLR.
In fact, my old Olympus OM10 (Quartz) has been sitting under the bed, mostly unused in the last ten years. Perhaps it's time to dig it out and sell it on.
Friday, 13 June 2008
Learning to make corsets.
A long time ago (April 2006), I made a corset.
It didn't fit me, but it did fit Ceri: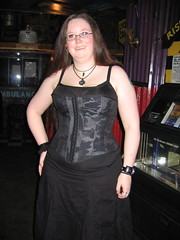
As it happens I never got around to making another one, and I eventually sold the pattern, forgetting that I still had all the boning for it! (I used plastic boning and hook & eye tape for Ceri's corset, as it was only supposed to be a mock-up.) The pattern is Simplicity 9769, and the boning required for it is as follows:
1 x 30cm busk
2 x 29cm 13mm bones
All remaining bones are 7mm sprung steel:
4 x 28 cm
2 x 27.5 cm
4 x 27 cm
4 x 25.5 cm
4 x 24 cm
2 x 23 cm
The cost to buy this lot individually would be £11.27, plus postage. Who wants to take it off my hands for a nice round £10, including UK p&p?
I also have the Laughing Moon corset pattern #100, for the Dore and Silverado corsets. Sizes 6-26 (Bust 30½" to 48", Waist 23" to 40" approx) are included. The pattern costs £7.75, plus postage. Anybody want it for a fiver?
All I've done with this pattern is take out the instruction sheets and read them. They're very thorough!
However, because I'm such an odd shape, and have such a lot of random and varied pains in my abdominal area, I decided that it was simply too much hassle to try and re-draft a commercial corset pattern to fit my shape. Instead I've spent today with a tape measure and a t-square, working out how to draft a corset pattern for myself.
I haven't looked at any historical books for inspiration, I'm not going for any kind of period-correct shape. All I want to do is make a little underbust corset, which fits my short waist and general proportions.
So far I've measured myself in all sorts of places. This enabled me to draw out a sloper based on my own measurements.
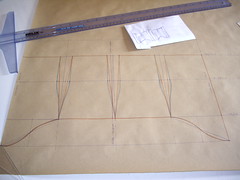
Then I worked out how much negative ease I needed in order to create a pretty shape, but also to (hopefully) remain comfortable. Once the new shape was drawn in, I could trace off the individual pattern pieces, and work out what length of bones and busk I need to order.
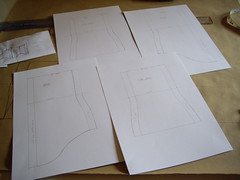
It's just a very simple pattern to begin with - only eight panels - but it will have three layers and should be a very strong corset. Assuming it fits, it should reduce my waist by about two inches, hopefully without being too tight across my abdomen. We'll see.
While I'm waiting for my bits of steel to arrive, I can start putting all the layers and working out how I want to sew them together. I have a plan for the fashion fabric, in the form of an old pair of trousers which I outgrew long ago, but couldn't bring myself to throw away.
Look out for a bright pink wool tartan corset coming this way in the near future!
Tuesday, 10 June 2008
Progress on the Pirate Coat
This is how Jenny's coat looked at nine o'clock this morning, after spending most of yesterday working on it.
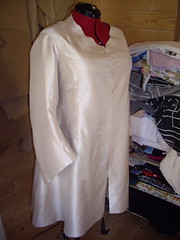
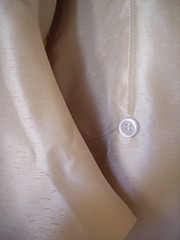
This is the lining - effectively "inside out", as the finished side will obviously be visible on the inside of the coat! All of the seams are flat felled, for strength. There's a button at the junction of these seams, for a bit of extra reinforcement.
Here's where I'm up to as of now:
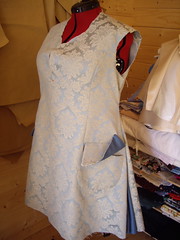
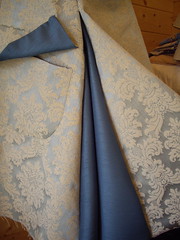
First glimpse of the fashion fabric! This is a heavy furnishing damask, from John Lewis. Yes, the patterns match down the front. Jenny asked for the godets to be in a contrasting colour, which will be seen only when she moves around. When she's still, they'll be hidden.
The pocket flap is lined in the same colour, and I've added a functional patch pocket underneath. The pockets are sewn on by hand, as I'd like to eliminate any top stitching if I possibly can.
Still to come - sleeves, cuffs, facings, and lots and lots of buttons!
Saturday, 7 June 2008
This Is England
We finally got around to watching This Is England last night. I've been wanting to see the film for a long time, even though I already knew that it would be very difficult for me to watch. I'm not a big fan of racism, violence and extreme right wing politics, and those are the main topics of the film.
I'm not well-enough informed, socially, politically, or historically, to be able to talk about the film from those points of view, but what I do want to talk about is the clothes.
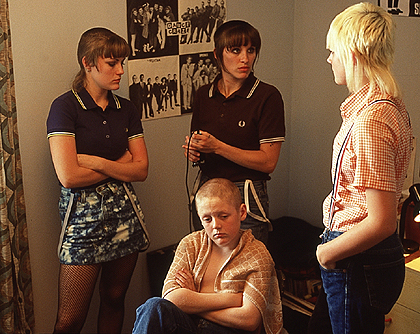
If there was one style of clothing which I truly wish I could wear but never have done, it would be this. Probably with jeans rather than mini skirts, but there's something about this style which really appeals to me. I do own two Ben Sherman shirts, although they're both prints, not checks. I've owned countless pairs of Doc Martens over the past twenty years, and despite the fact that Paul makes a face every time I show him photographs, there's something extremely appealing to me about that hair cut. I do remember going out in the 1980s wearing a white shirt, black braces and a trilby, but for all the Doc Martens I've ever worn, I've never even been tempted to buy a tall cherry red pair.
When I was a Goth, dressing was easy. Everything black, lots of eyeliner, pointy shoes or the most enormous boots I could find. For all the protestations of "individuality", what I liked best about being a Goth was having a group that I demonstrably belonged to, and I demonstrated it with my clothes. I like dressing up, I like the music, I like bats and skulls and books about vampires. It was easy for me to be a part of that group.
But dressing like a skinhead? That's much more problematic. When I was reading The Way We Wore, last year, it touched on a lot of the things I've been trying to think about coherently while I was watching the film.
The original skinheads, in the late 1950s, had nothing to do with racism and violence. Theirs was an inclusive culture, born directly out of living and working with Caribbean immigrants who'd recently started arriving in the UK. Without these groups mingling together, we'd never have had Ska and 2 Tone, and bands like Madness or The Specials. But, the economic climate in those times was terrible, and the feeling did develop that other people were coming into "our" country and taking "our" jobs and "our" houses. Racially-motivated violence was breaking out all across England, predominantly in working-class communities, and this escalated into the Notting Hill riots of 1958.
The same thing effectively happened during the early 1980s. The country was faced with record levels of unemployment, along with an increase in immigration from countries such as Pakistan. The Falklands war began in 1982, and with it came a surge of popularity for far right wing politics. The Teddy Boys, who'd been the main antagonists during the Notting Hill riots, had been all but forgotten, but skinhead, punk and the National Front became inextricably linked in the public image until the skinhead look unequivocally represented a uniform of racism and hatred.
There are countries where the skinhead image still represents what it did during the 1950s - a working-class background and the love of a certain type of music. Hel Looks, a website which documents street fashions in Sweden, demonstrates that the skinhead look is still popular. In parts of America, skinhead is more closely linked with 1970s punk.
I've worn some unusual clothes over the years. As a Goth, people were forever telling me to "cheer up", or reminding me that "it's not Hallowe'en". Having pink hair is apparently a license for people to point and shout at me in the street. I'm more than used to being stared at because of my clothes, and not always in an appreciative manner.
But to walk down the street, in England, wearing tall cherry reds, jeans, braces and a feather cut? However much I might enjoy the style and the music, I just couldn't do it.
(More here, from Wikipedia.)
Friday, 6 June 2008
Bitten by the Sock Bug.
I've been knitting since 2005, and it seems as though I've spent the whole of that time avoiding knitting socks. I like big, chunky jumpers, made from big, chunky yarns. You can't really knit a wearable sock on 10mm needles! They're small, they're fiddly, the Magic Loop technique is incomprehensible to me, and knitting with a set of four double-pointed needles is like wrestling with a large wooden tarantula.
And then, as I mentioned the other day, I knitted the Sox on 2 Stix.
I've been wearing them as house-socks until now, as I was a bit afraid of rubbing away the fragile yarn inside a pair of shoes. Today though, I wore them out of the house.
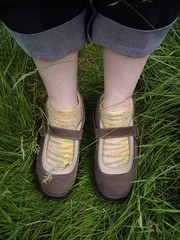
I only went to the Post Office and back, to see off my last Ebay parcels. But all the way there I wanted to do a little dance of joy, about my lovely socks! Every person I passed, I wanted to say, "Hey! Are you looking at my socks? Look at my socks! I made those! I knitted them myself! Look at my socks!!"
I've never really subscribed to the school of thought that wearing "special" underwear can make you feel better. In my experience, wearing fancy underwear guarantees only that I'm going to be uncomfortable and cross. But, I do like socks, and my delicate little feet dictate that I can't wear shoes without them, so I may as well wear socks that I like. I have socks with stripes and strawberries and bees, and even a pair with glow-in-the-dark aliens on them! None of these, however, can compete with the joy of wearing your very first pair of handmade socks.
Wearing handmade socks is so awesome that I now have no choice other than to buy a set of wooden double-pointed needles, and learn to knit them "properly".
I am being aided and abetted in this by
Tuesday, 3 June 2008
Paying the Price.
I've just been reading an interesting discussion on a LiveJournal sewing community about why customers are unwilling to pay prices which genuinely cover the cost of a handmade garment, whether it's a reconstructed t-shirt or a couture wedding dress. I've had many customers - individuals and other small businesses - come to me asking for hand-made clothing, only to disappear without a trace when I told them the price.
Thanks to companies like the dreaded Primark, clothes have become cheaper and cheaper to buy, and the actual cost of their manufacture (in both monetary and human terms) is no longer reflected in their selling price.
As an independent businesswoman in the UK, I am legally obliged to pay myself a minimum wage (currently £5.52 an hour) for my work - and yet in many cases I am simply not able to do that. If I charged the full amount of what my work was actually worth, my customers wouldn't be able to afford it, and I would make no money at all.
Unfortunately, by selling myself short, I devalue not only my own work, but also that of other business and craftspeople in a similar position, and I exacerbate the problem of customers expecting to pay cheaper prices.
If I were a computer programmer, I'd be charging an awful lot more than £5.52 an hour. Heck, if I were a plumber, I'd be charging more than ten times that! When did dressmaking, or any form of craft which requires a development of skill to learn, become such an undervalued occupation?
Harman Hay has written a really interesting article on the subject: Why do wedding dresses cost so much?
I've been the lady hand-sewing the beads onto your precious dress, and I've listened patiently to the complaints about the cost of the alterations when I've had to hem, by hand, all ten tulle petticoat layers under your skirt. I can state unequivocally that although I was paid slightly more than minimum wage for doing that job, neither I, nor the husband and wife team who ran that independent bridal store, were making our fortune from the cost of that work.
I've also had several brides come to me, assuming that because I was making them a "home made" dress, it would be much cheaper than one bought off the peg. In actual fact what I would be making is a couture dress, which is a different thing altogether!
Last week I wore a dress that I'd made myself, to work. One of our customers expressed surprise that the dress was "home made", because "it looked really neat". Now I have eleven years' experience as a dressmaker - of course my sewing is neat! Would you react with surprise if you hired a plumber with eleven years' experience, and he turned out to do a good job? No, and you'd pay him good money to do it.
The lady who made the comment obviously had no way of knowing that I've been a dressmaker for a long time, but it made me very sad that "made by hand" in her expectation was inextricably linked to "looks a bit rubbish". The current rise in popularity of "DIY" and reconstructed clothing is also doing nothing to disabuse people of this notion, as so many sellers of this style are using the term "DIY" to apparently mean that they don't have to finish seams or be able to sew well.
Now I'm completely self-taught, so I have no issues whatsoever about people just getting in there and having a go! I've written a couple of tutorials for simple skirts, and I hope to write more in the future. I also enjoy reconstructing t-shirts, and making clothes out of recycled materials. However, I do believe that if you're going to sell your work, then there are some fairly basic standards that need to be applied. Otherwise, once again, you're lowering the standards and expectations that apply to all of us.
I don't think I'm ever going to be able to make a living from my dressmaking, and that makes me very sad. It's not going to stop me from sewing, because I really enjoy it, but I do wish that it were possible for more people to understand the value of these skills that I've worked hard to attain.
Monday, 2 June 2008
The green cardigan's almost finished!
I've been trying to knit a cardigan with this green Rowanspun Chunky for ages. It started out last year as the Nicky Epstein Cardigan with Cabled Points, but the pattern made me so cross that I unravelled the whole thing in a fit of pique. I'd made it all the way through the back, both sleeves and half of the left front, so it wasn't a decision to be taken lightly. That was a heck of a lot of knitting to undo!
In the middle of March I decided to embrace the ways of Ann Budd, and write my own pattern.
I feel as though I've been working on this forever, probably because I've been knitting with this yarn since September, but it's actually taken about ten weeks from writing the pattern to finishing the cardigan. I've also had a good few weeks where I didn't knit at all because of my wonky wrist.
As this is the first pattern I've written myself (except for the pink scarf, which wasn't quite as complicated!), I really wasn't certain how it would come out. Thankfully, I'm really pleased with it!
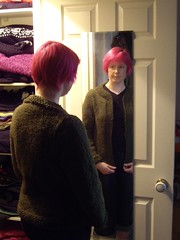
Here you can see me wondering whether the edges will actually meet, so I can put the zip in.
(The answer's yes, it's very stretchy!)
The only thing I would change is the fit of the armscye. Ann Budd's measurements are quite generous in this area and I prefer a more fitted style, so I'll be making the sleeve head a bit smaller in my next pattern. Otherwise, the waist shaping is in the right place, the measurements are spot on, and I'm really pleased!
In other news, the Ebay saga continues.
The buyer who was bidding on my boots but had the "non paying bidder" feedback has now been formally removed from Ebay, and her bids have been cancelled. Hoorah!
This is, of course, great! Justice has been served, and all that. However, it does mean that I've just lost twenty quid's worth of bids on my boots.
Posted by
Claire Smith
at
00:06
![]()
![]() 0
comments
0
comments
Labels: cardigan with cabled points, knitting, moss stitch cardigan, Nicky Epstein, rowan, rowanspun chunky
Sunday, 1 June 2008
My First Socks!
After knitting six gloves over Christmas (two pairs and two half-pairs), I decided the time was right for me to make my first foray into socks.
I still hate loathe and detest wrangling with a handful of double-pointed needles, so I decided to find a pattern that I could knit using just two knitting needles, like a normal person. ;P
Sox on 2 Stix, from Knitty turned out to be the solution.
Nicola had given me two balls of Louisa Harding Kimono Angora for Christmas, so that seemed perfect for making a pair of really luxurious first socks.

The pattern is begun at the heel. You work short rows to make the heel cup, knit down to the toes, work the short rows again, and then knit your way back up the instep. Then you knit your way around the ankle, until the leg of the socks is as long as you want it to be. Seam the sides, et voila! Socks!
I decided to make tiny little short socks, as they're the kind that I wear most often, and they go nicely inside my summer shoes. I had a few issues along the way, mostly with the short row shaping leaving enormous great holes in the toes and heels! It didn't seem to matter how I wrapped and turned, the holes still appeared, so I fixed this in the time-honoured fashion of darning the toes as I was sewing up the seams. I left the holes in the heels, as they actually look quite pretty, and they aren't uncomfortable to wear.
I also discovered that after I'd cast off the first sock, I couldn't get my foot inside it! I have a high instep and I tend to cast off very tight, which turned out to be a bad combination. Fortunately I was able to undo the cast off and try again, but this did leave the socks quite loose around the ankle. Next time I think I might try 1x1 ribbing for the cuff instead of 2x2, and matters would definitely be improved by using a yarn with a bit more natural stretch to it.
So far I've only worn these socks for padding around the house. Kimono Angora isn't really an appropriate sock yarn, and I know that as soon as I put these inside a pair of shoes I'll wear straight through the toes. They're amazingly soft and fluffy and comforting though, so these are definitely for those rainy weekends when you're curling up on the sofa with a weepy film and a big bar of chocolate.
I also discovered the hard way that, thankfully, Kimono Angora doesn't felt! I'd managed to scoop the socks into the machine with the rest of the laundry, and I gave a little shriek when they fell out, all wet and sorry for themselves. They had shrunk a little bit, but I put them on my feet immediately and padded around squelchily in the kitchen for a few minutes, and thank goodness they're fine.
I'd like to knit some more of these, to go with all of my summer skirts, so what I need now is some recommendations for DK weight sock yarn. I like self-patterning or variegated colours the best, but I really would prefer DK to 4-ply for this pattern.
Any suggestions?
Posted by
Claire Smith
at
12:35
![]()
![]() 0
comments
0
comments
Labels: first socks, Kimono Angora, knitting, Louisa Harding, socks, Sox on 2 Stix
Tuesday, 27 May 2008
REVEAL: a showcase of quality hand-made craft
I mentioned this a little while ago, but some of my badges are going to be in an exhibition!
It's called REVEAL - a showcase of quality hand-made craft.
It's on from Sunday 6th to Saturday 12th July, 10am to 5pm every day, and entry is free.
It's at the Henley Exhibition Centre.
The website has a gallery of work by all the exhibitors - I'm really looking forward to going along and seeing all the lovely things!
Monday, 26 May 2008
A lovely compliment.
I wore the hawaiian halter dress to work on Saturday. One of our customers paid me the greatest compliment, by buying the same pattern and fabric so that she could make one for herself. :)
I've also had an email from
She also gave me some really useful feedback about wearing them (quoted with permission), which will hep me to adjust the pattern for the next pair:day 1
they are snug but not uncomfortably so, just snug as in brand new and all mine
don't stay on heels though, when you step up you heel flops out, almost like walking in flip flops. (doesn't bother me much though) the back of the slipper doesn't get caught and mashed down when you step down, so up side is your foot settles right back in where it should be when you step down.
seems like the sole could do with a 1/2 inch more in diameter all the way around, not sure why, maybe just because the foan isn't smashed yet.
feels like the satin part is getting wrinkled under my toes, may also be the foam adjusting
day 4
sides have "broken down" because my foot has shifted in the left one so every couple of steps I have to adjust my foot so it is hitting the pad outline instead of my heel being off the left back edge.
no more satin wrinkle under toes, foam is only mashed under my big toes and ball of my foot, but that and the rest is still plenty to shuffle about in. feels like i have socks on not slippers, I like that.
day 6
still same as day 4 so I think this is their stable place of being, the foot shifting I think could be fixed with the back coming off, maybe with some elastic similar to your brocade ones? I think the heel height needs to be almost an inch higher for me at least and then have some elastic.
I still absolutely love them and hardly ever take them off so thank you and hope this helps.
These are pretty much exactly the same things that I experienced with the monkey slippers, so I'm getting a really clear idea of what kinds of changes need to be made:
I'm busy sewing a coat at the moment, so slippers will have to wait a little while. I'm realy looking forward to getting back to them though, especially now that I've got my John Peacock shoe sourcebook to inspire me!
Sunday, 25 May 2008
Simplicity 4072 - the cupcake duro!
Finally, I have finished making Simplicity 4072! I've been working on this all week, and it took far longer to put together than I'd anticipated. I'm feeling thoroughly grumpy about this dress at the moment. It feels like a bit of a Monet - from a distance it looks great, but close up it all goes a but fuzzy. Every time I look at it, I see something that I could have done better.
I'm hoping it'll redemm itself when I actually put it on - although that neckline seems awfully low! I might find myself digging out the leftovers, to make a cupcake-print modesty panel.


The cupcake print is a Rowan quilting cotton, also available in other colourways from eQuilter. The plain pink is the Bishopston organic cotton, in Raspberry. It couldn't be a more perfect match for the pink of the cakes!
I do like the look of this dress very much. I bought the pattern a long time ago, inspired by Erin's Darth Vader dress, but I didn't find the perfect fabric combination until I put these two together.
I did find it quite difficult to make though, which surprised me. There are no sleeves to set in, there's no zip... but there is a lot of "pivot at small dot" and "clip to curve", and the neckband was an absolute so-and-so to put on neatly. You're sewing a convex curve to a concave one at the back of the neck, and I had to check at least three times that I was definitely sewing it all together the right way round!
If it stops raining over the Bank Holiday, I'll ask Paul to take some photos of me cavorting about in my new dress. If it looks good on, I have the perfect fabric for at least two more...
Posted by
Claire Smith
at
22:27
![]()
![]() 0
comments
0
comments
Labels: bishopston, cupcakes, duro, equilter, organic, rowan, Simplicity 4072


