
So, I've made a few pairs of slippers now, and they seemed to go quite well. I thought I would attempt the next stage in the experiment towards being able to make my own shoes.
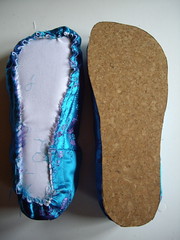

In the left hand photo, the slippers have completely finished uppers. At this point I would normally attach a felt sole, and that would be it! I decided to try a cork sole (made from an old floor tile!), so you can see it laid on top of the slipper.
I tried to sew the cork directly to the upper, which did work, but it left me with several rather painful holes in my fingers from pushing the needle through the cork! Eventually I reasoned that if I could sew through cork by hand, surely my sewing machine would make a better job of it. I sewed the cork sole to a piece of drill, and used heavy thread to turn over the edges.
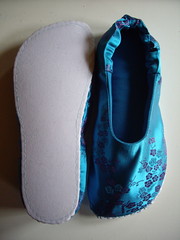
This gave me a strong sole which could then be sewn by hand directly on to the upper. I removed the plain cork sole, and made them both this way.
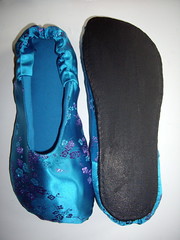
The soles are now black, having been covered with a coating of liquid latex. This makes them non-slip, and also fairly waterproof. Several more coats will be needed if they're going to be suitable for walking around outside - and of course the uppers aren't waterproof at all, being brocade!
There turned out to be quite a few problems with this pair, although now I've identified the difficulties I should hopefully be able to avoid them next time:
- The slippers are too small.
I hadn't allowed for the fact that so many layers would take up quite a lot of space. I also hadn't allowed enough depth in the pattern for my toes. I can easily amend this for the next pair, by adding extra allowance into the pattern, particularly at the heel and toe. - The slippers are uncomfortable at the heel and toe.
In the first picture, you can see where the seam allowances from the upper are folded round under the sole, and stitched in place. Even though I graded the seams, you can still feel a ridge under your foot from this extra fabric. I need to grade the seams more closely next time, and trim a little more away around the curved areas. - The sole was difficult to sew into place.
Even after I'd given up on trying to hand sew though the cork layer, it was still quite tricky to sew the sole into place neatly. I now understand the purpose of a welt. It bridges the gap between the upper and the sole, and gives you a neat way of finishing the join which avoids having stitching on the bottom of the shoe which would eventually wear away. However, adding a welt might compound the problem of having too many layers of seam allowance between the upper and the sole.
Whilst it's frustrating to have spent time making an uncomfortable pair of slippers which don't even fit, I've definitely learnt enough from this process to be looking forward to making the next pair!

No comments:
Post a Comment